DIY Folding Wall Desk: a Space
如何在Mac上使用Spotlight搜索:按下Command+Space键,输入关键词查找。 #生活知识# #生活经验# #软件#
Introduction: DIY Folding Wall Desk: a Space-Saving Wood and Resin Project
In this instructable, I show you how to build a functional folding wall desk that doubles as wall art. This DIY folding wall desk tutorial guides you through building a multifunctional piece using woodworking and wood/resin art techniques.
Even if you don't need a folding desk, the techniques covered in this build can be directly translated toward other woodworking or resin art projects.
There are several things which are difficult to fully explain with words and images, so be sure to check out the video tutorial.
Supplies
Step 1: Prepare Resin Mold Base
There are many ways to make an epoxy resin mold.
For this project, I chose to use leftover material in my workshop.
First, use particle board or plywood as your flat base. Cover it entirely with overlapping packing tape (overlap by ¼" and smooth out bubbles) This provides a cheap, effective release layer.
Apply furniture wax or Vaseline evenly over the tape to ensure easy demolding.
Step 2: Prepare Mold Frame
Place your live-edge wood on the base.
Frame three sides with 1x2 lumber, securing with brad nails. Remove the wood temporarily.
Seal all edges (inside and out) with silicone caulk to prevent leaks. Clamp the wood back in using a scrap 2x4 and straight edge.
Test to make sure the wood fits in the mold.
Step 3: Prep the Wood
Sand the live edge with 220-grit sandpaper to remove loose debris.
Step 4: First Resin Layer
Measure and mix 32 oz of resin (16 oz each Part A and B). Divide into three containers: 16 oz in one, 8 oz in each of the others.
Add cobalt blue pigment to the large batch, light blue to one small, and 10 drops of white alcohol ink to the last.
Pour the deep blue first, followed by light blue and the alcohol ink mix.
Quick Note: There is not a right or wrong way to add and mix colors. Use your imagination and creativity how you see fit.
Step 5: Second Resin Layer
Top with the alcohol ink resin and blend with a heat gun for 3D wave effects. Alcohol serves as a resin dispersion agent and creates ocean waves and cool effects such as resin lacing and cells.
Alcohol ink can be added directly to resin or pre-mixed with clear resin before pouring. Essentially, each option produces a different type of look.
Finally, I moved the resin and alcohol ink with a heat gun.
Step 6: Final Resin Layer

Mix and pour again: Deep blue in the back, light blue in the middle, translucent near the edge.
Add alcohol ink directly to translucent areas for enhanced depth. Blend with heat gun until satisfied. Allow full cure.
Step 7: Demold and Clean

Lift the piece from the base—the tape and wax make release easy. Use a rubber mallet to remove the frame sides. Sand off any residue.
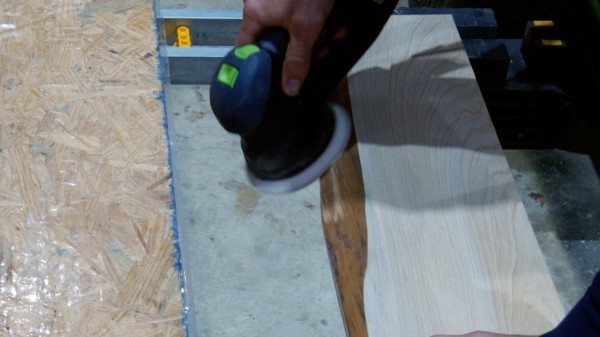
Step 8: Sand
My festool RO125 rotex sander improved my projects dramatically. This sander is expensive, but it is worth every penny. Keep in mind, an orbital sander works as well.
Also, I use a soft sanding pad with 320 grit sandpaper. The soft sanding pad allows the sander to more closely match the wood contours.
First, secure the piece while sanding. Start with 120 grit, then 180 grit, then 220 grit, and finally 320 grit.
Step 9: Polish
For a matte finish with vibrant colors, apply medium polishing compound in rotary mode (if using the Festool RO125). If not, use a polisher for this step. Buff off excess with a sheepskin pad.
Step 10: Install Hinges on Wall
Determine desk height (e.g., 28-30" from floor). Use a stud finder or neodymium magnet to find wall studs (it locates drywall screws quickly—studs are typically 16" apart).
Mount the hinges to studs with 1.75" screws, using a level for alignment.
Test the folding mechanism.
Step 11: Attach Desk to Hinges
Center the desk on the extended hinges and secure with screws into the wood (avoid drilling into resin).
Finally, test the functionality of the folding wall art desk.
Step 12: Conclusion
I hope this instructable provided you with value. Please feel free to leave a comment if you have any questions - I'm happy to help.
Be sure to checkout my YouTube channel and my website for more DIY tutorials.
网址:DIY Folding Wall Desk: a Space https://klqsh.com/news/view/288622
相关内容
Download a wall chart of all 2025/26 Premier League fixturesOffice Supplies : Target
Battery DIY
New Edinburgh Park Fieldhouse – New Edinburgh
家居、生活用品
How to Set Up Multiple Monitors Windows 11: A Step
A guide to Austin's legendary hotel, The Driskill
Domi Wall Sconce
How to Remove Background Noise from a Podcast Audio
Launch of The Nest I/O Tech Incubator and Startup Space
随便看看
最新乐趣
- 宋威龙虚晃一枪露腹肌引热议
- 真正的家人并不拘泥于血缘关系
- 交换戒指环节啊啊啊啊啊啊啊啊啊啊啊啊
- 你回来了,我以为你不回来了
- 鄂台书法家武汉挥毫传承中华文脉
- 继子反抗后妈霸占房产,双方爆发冲突
- 节目组还是很严谨的Ta们的损失
- 《百花杀》对于爱看女频的人来说真的很友好,小孩子才做选择,大人我全都看
- 邵兵、邵子恒父子齐上阵,二位同框也是十分养眼了
- 王骁《南京照相馆》提名百花最佳男配,演什么都像样,真的恭喜了!
热点乐趣
- 85784
- 61365
- 59374
- 52129
- 33542
- 31010
- 29215
- 22174
- 17928
- 16233